
bevy_atmosphere 0.4
Hey, Jonah here. With the release of bevy_atmosphere 0.4 (for bevy 0.8), I thought I would take the time to write a short article about the experience and technical details. Source code can be found at JonahPlusPlus/bevy_atmosphere.
bevy_atmosphere is a procedural sky plugin for the Bevy game engine. It offers complete customization of the sky simulation, allowing for any number of effects (see Figure 1).
The focus for this update was to take the opportunity to revamp the internals, to make it more flexible and simple to use, while also improving the performance. Previous versions of bevy_atmosphere were limited, for instance, offered no support for split-screen apps. The sky shader also ran every frame, which was often redundant when the material was not changing, and had very noticeable color banding.

There was also a disconnect in the naming convention (“Mat” suffix instead of “Material”) and shader language choice (GLSL instead of WGSL) from the rest of the community. The first thing I did was rewrite the shader in WGSL. Besides being more Bevy-like, it also gave the benefit of shader modularization (see Figure 2). This allowed me to organize parts of my shader (data types and logic) and allow for crate users to create their own sky shaders by importing my shader modules.
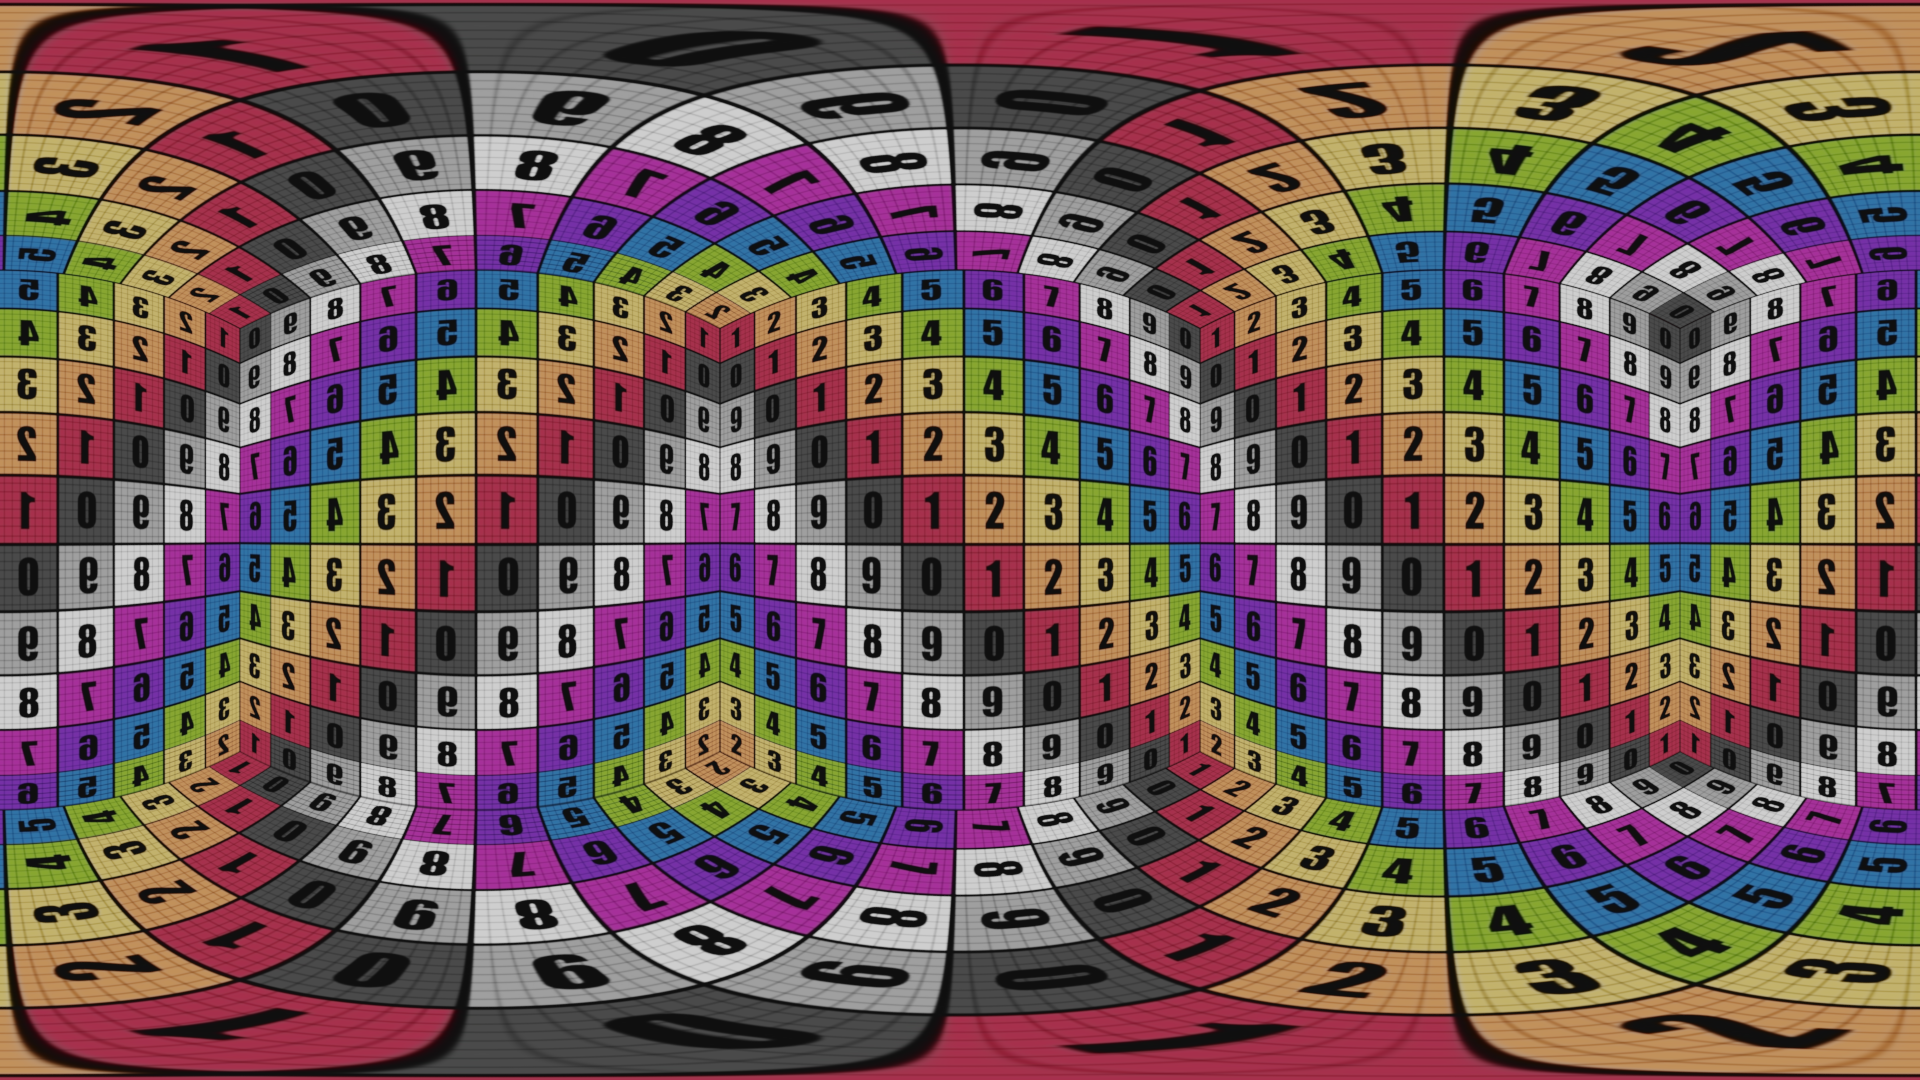
For optimization, I wanted to make sure the shader only runs when the material is updated, instead of rendering every frame. So instead of rendering to the screen, the material would be rendered to a texture, that would then be used in a faster material. The tradeoff is that instead of just rendering the pixels on the screen, you have to render pixels off the screen as well. It’s worth it though, since you wouldn’t expect the material to be updated every frame, but can be updated occasionally, with no perceivable difference. Once I get the texture though, I need something to display it on. I was using a sphere to render the sky before, so I considered using equirectangular projection (See Figure 3) to map the texture back to the sphere, but that was convoluted. Instead, I decided to move to a skybox, and create a 6:1 cubemap for the 6 faces.

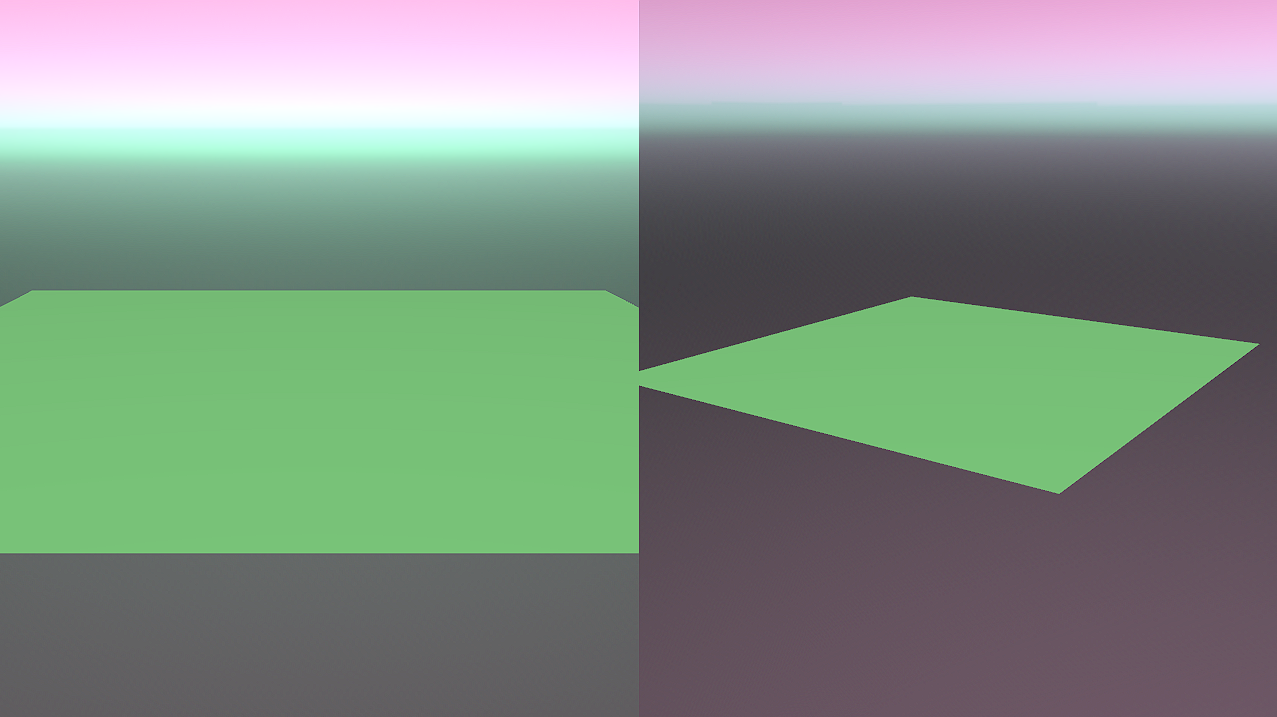
To render the texture, I tried using a custom mesh, that was 6 quads in a row (see Figure 4). I would then get a camera to render the shaded mesh to a texture, which could then be displayed on the skybox mesh. This proved convoluted; it required a bunch of setup and guarantees and in order to render it only when the material changed required a special render pipeline for this one object. I decided to look for another solution.
I thought about it and landed on compute shaders. With a compute shader, there aren’t any cameras or meshes. Instead, I can just operate on the texture itself in parallel. So I went to work on converting my vertex/fragment shader duo to a compute shader.
Before, my shader was run for every pixel on the screen inside the fragment. But now, there isn’t this “dynamic resolution”, instead, I have to provide a texture with a set size. I decided to just go with a (512 * 6)px by 512px texture (for now). To render each pixel, I could use compute workgroups and just set the number to the resolution divided by the workgroup size (number: (X: 512/8, Y: 512/8, Z: 1), size: (8, 8, 1)) and render all 6 faces at once inside a work instance by using the instance ID + offset as the pixel location (note: while writing this, I realized that I could instead use the Z component to control the face and run (512/8, 512/8, 6), making the shader even more parallel! But it only sped it up by ~10μs… Better than nothing?).
So I finally got the compute shader working and mapped it the skybox! It was working, but had one minor issue that I was kinda expecting: texture bleed (See figure 6). To make textures look nicer, they typically are filtered when sampled. his means that the pixel you sample is mixed with surrounding pixels, to make the texture not look so pixelated when zoomed in. However, the skybox texture isn’t seamless, so pixels from other faces bleed into each other near the edges. I could turn off texture filtering, but I would have to increase the resolution, which isn’t desirable. I attempted to create a margin, where there are extra pixels to be filled in with the surrounding, getting rid of texture bleed entirely, but that proved difficult to do with a shader without another pass, and the second pass would be so small it might hurt performance. Rather, I just shrunk the UVs of the skybox mesh by 1px (later changed this…). Nobody would miss a few similar pixels at the edges, but everyone would notice some off-color pixels.
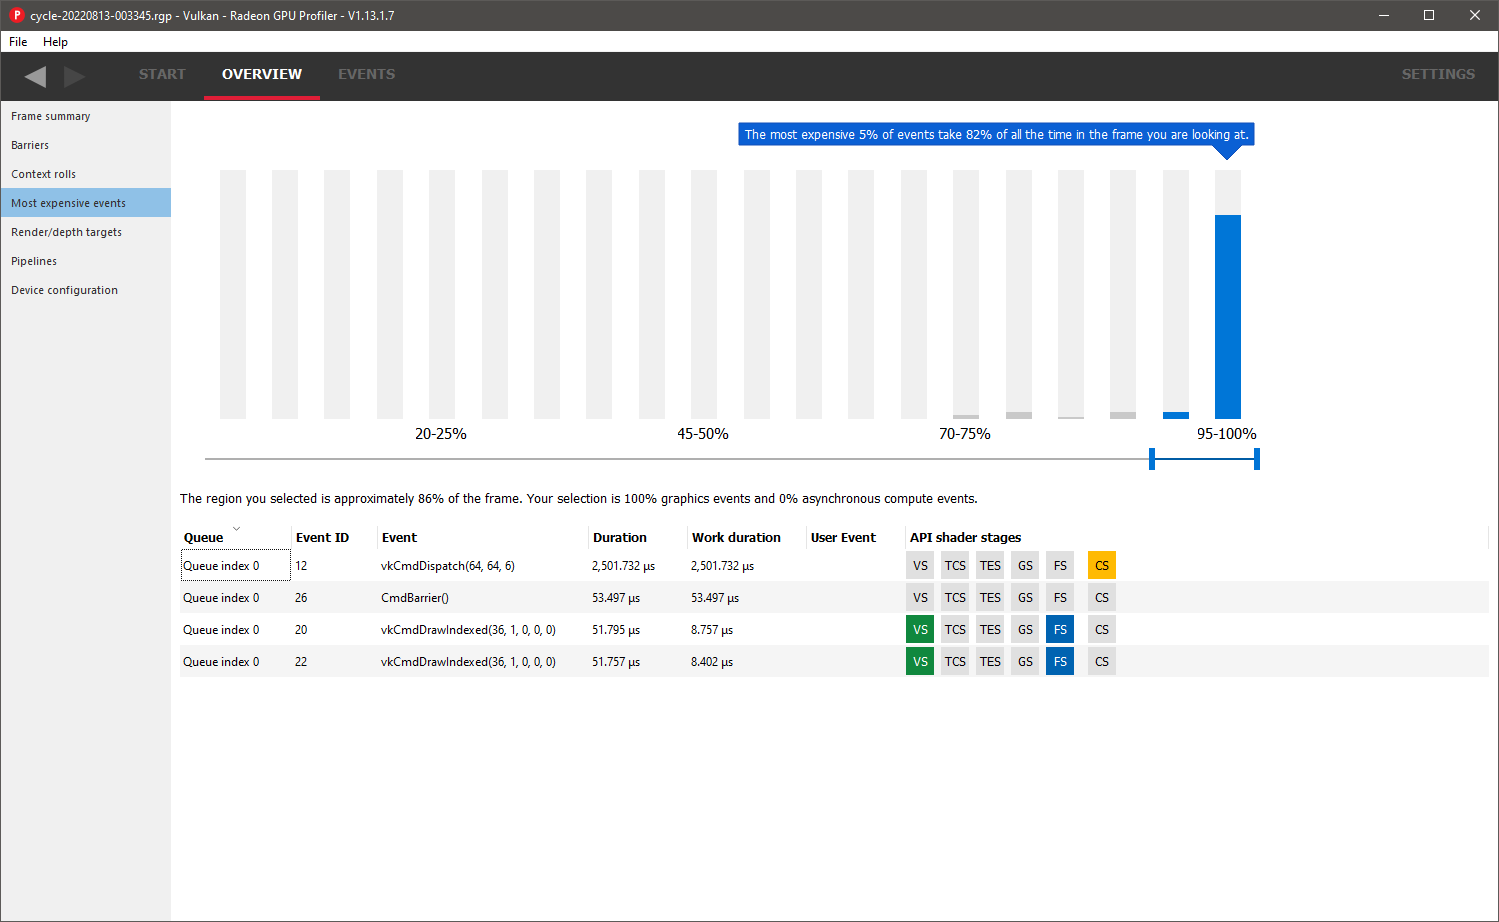
During this, I had a bit of wild goose chase trying to make the resolution dynamic. There are a few things one should know about benchmarking Bevy games. First, FPS isn’t a good measurement of performance, as the FPS will increase and decrease depending on what’s happening in the scene. Disabling VSync is also a bad idea, since the unthrottled FPS can cause input lag. So it’s better to use an external profiler, like in Figure 7, that can measure the duration of events and not just frame presentation. I got these things wrong, and led to me making a bunch of bad conclusions. For instance, I thought that changing the resolution from anything other than 512px would cause input lag, but that was me disabling VSync. However, using too small or too large textures did cause the event duration to increase, making 512px the optimal resolution of my machine. I later found a solution to make dynamic resolution possible, but I considered baking the resolution into the plugin.

I now wanted to fix the color banding issue.
I knew I had to arrange/alter the pixels in some way to smooth out the colors, but wasn’t sure how.
I tried to use a hash function to adjust the light rays for individual pixels, but that created a cross hatch pattern instead.
The Bevy Discord server was so helpful, not just for this part, but for so many of the problems I had.
Discord user Griffin pointed me to a dither function that solved this issue instantly (see Figure 8).
Big thanks to them for their help.
So, after about a week of work on this, most of the changes I wanted were done.
I just needed to figure out how to display the sky behind everything else.
Before, it was a sphere doing a depth test.
But that had issues; it would clip and so a radius value was needed to make it really large so that clipping wasn’t noticeable.
I couldn’t find a better solution that didn’t use some sort of technique specific to another engine or graphics library.
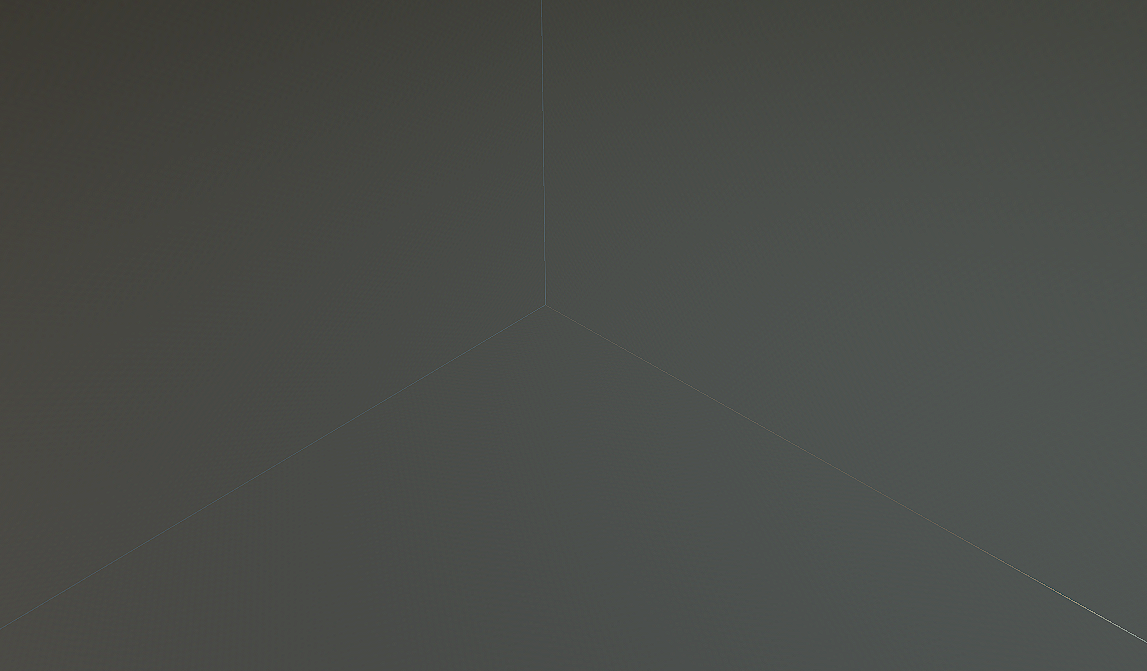
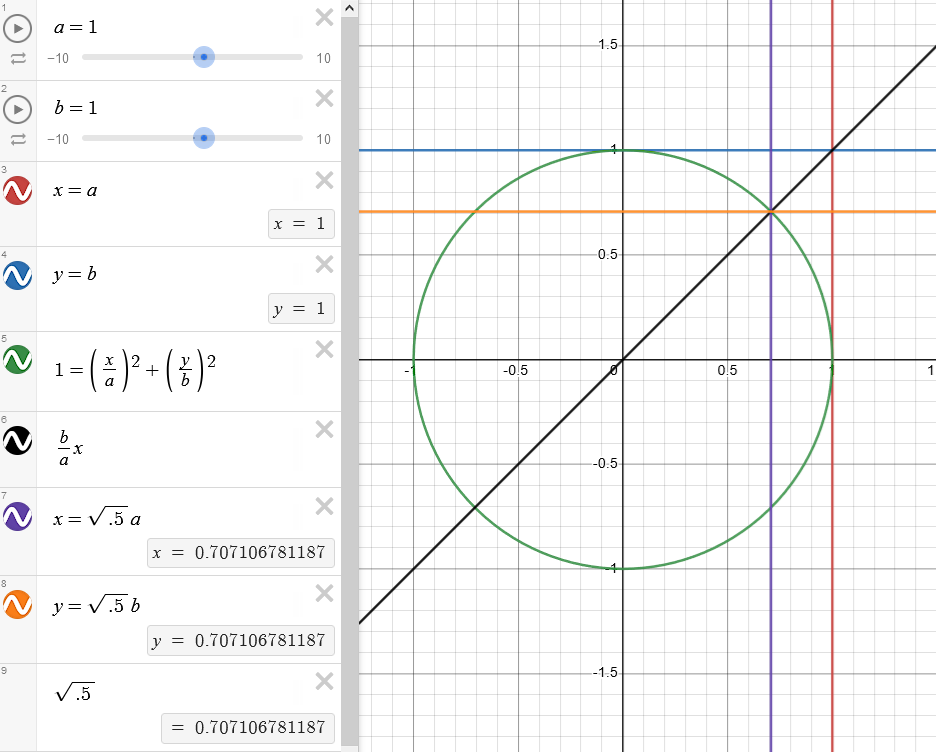
But instead of having an adjustable value, I changed it so the skybox geometry generated used the far field of the camera it was attached to, so the skybox will always be the farthest it can be (except in the case the user changes the far field of the camera without updating the mesh), which is √(1/2) * far (see Figure 9).
It now uses an unlit StandardMaterial instead of a custom material with a depth test, which was for the most part redundant.
So I thought I was done… But then I solved the dynamic resolution problem. Instead of using a flat 2D texture, I could use a cube texture!
I was a bit new to cube textures, so had avoided them, but they are actually pretty simple: instead of sampling using a 2D UV coordinate, you use a 3D normal to pick a pixel from inside the cube. This leads to better filtering, since the layout of faces are known. I could get rid of the UVs from my mesh entirely, relying on normals instead. However, while sampling is straight forward, storing to a cube texture isn’t. There is no way to store to a cube texture in WGSL. So, we don’t; instead I could create what is called a texture view. When writing pipelines, shaders aren’t actually given the texture directly, instead, they are given a view of the texture. What this means is the skybox material can have a cube view of the texture, while the compute shader can use a 2D array view that has 6 layers. It was actually easier to write the shader this way, cause it’s not dependent on any mapping from workspace coordinates to normals. However, making the separate texture views was a bit more difficult. When updating the size of a texture, it’s actually destroying the old texture and replacing it. In order for the views to be valid, the systems must be ordered so the new views are created after the texture.
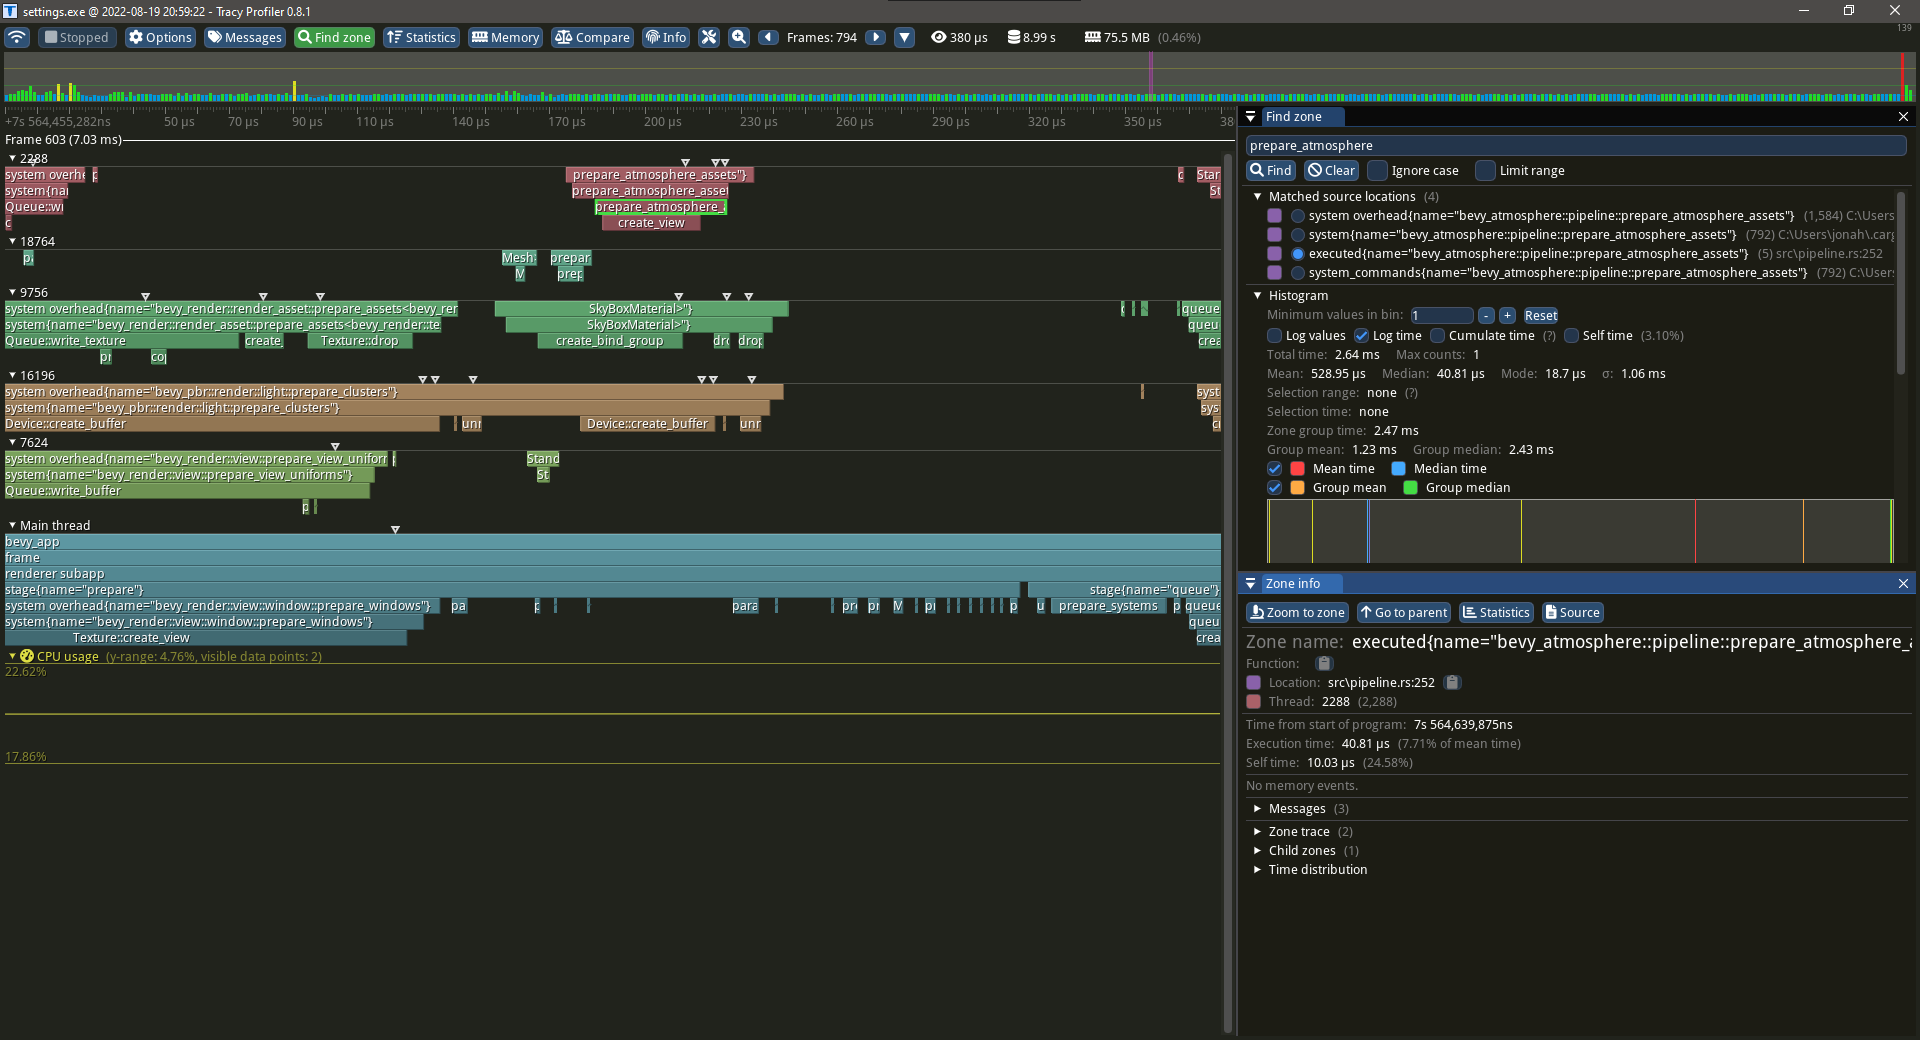
This took a bit of debugging, which tracy, a real-time profiler, was most helpful for (See Figure 10). The debugging needed for this side feature was actually the most time consuming part of this update. It turns out I had a problem where the compute shader could run before the texture was ever updated, so when it was recreated, the sky appeared pitch black. Once I found this, it was just a matter of synchronizing both processes using events.
So I wrapped it all up, wrote the documentation and examples, and now it’s published! Also, the project is now dual-licensed under MIT and Apache-2.0 (big thanks to all previous contributors for their work and for agreeing to the re-licensing)!
I had a ton of help from the Discord server.
Big thanks to robswain, Griffin, StarToaster, and cwfitzgerald!
# Change Log
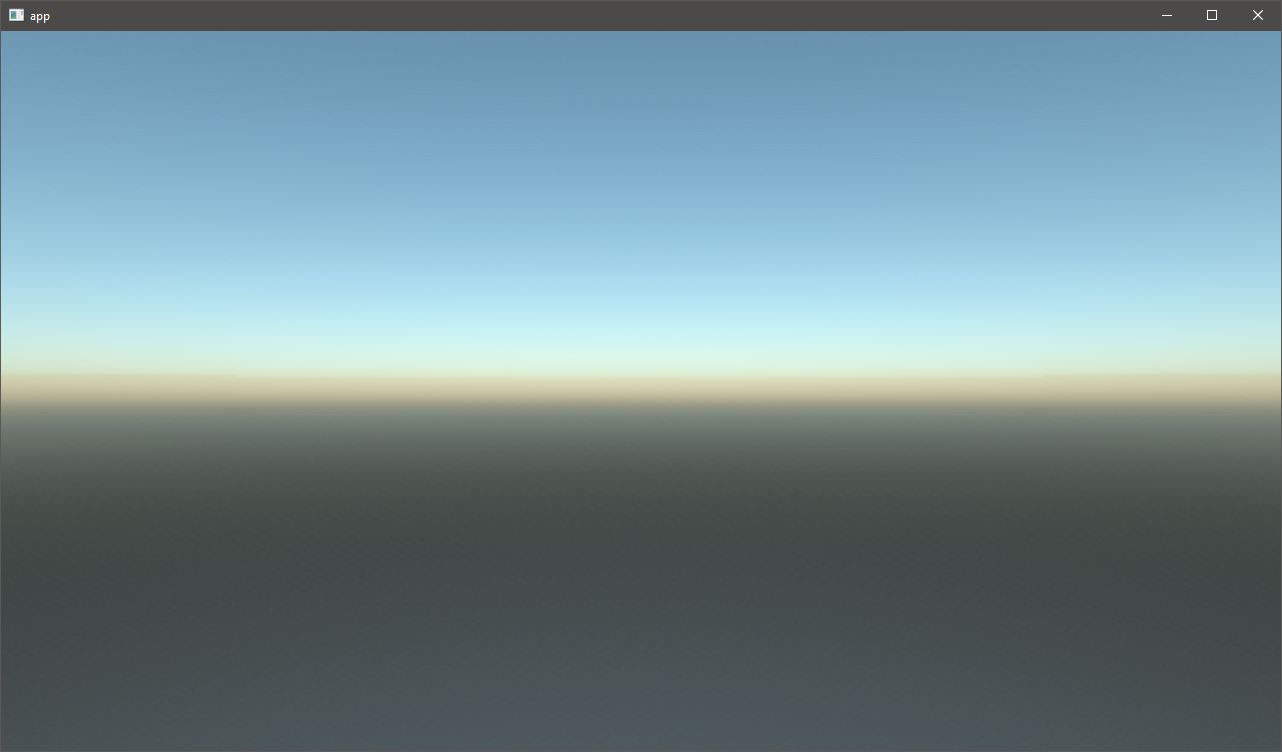
The following is now the simplest way to use bevy_atmosphere, taken from the “basic” example (see Figure 11):
use bevy::prelude::*;
use bevy_atmosphere::prelude::*;

fn main() {
    App::new()
        .add_plugins(DefaultPlugins)
        .add_plugin(AtmospherePlugin)
        .add_startup_system(setup)
        .run();
}

fn setup(mut commands: Commands){
    commands
        .spawn_bundle(Camera3dBundle::default())
        .insert(AtmosphereCamera(None));
        // None means that it doesn't insert a render layer component
}
- To change the sky simulation parameters, you would add/update an
Atmosphereresource with custom values. - The plugin doesn’t just pick the first camera, but can be used on select cameras using the
AtmosphereCameracomponent, which holds an optional render layer for the spawned skybox to be on. - The plugin will automatically create skyboxes for atmosphere cameras during the
ATMOSPHERE_INITstartup stage, which can be disabled by turning off the “automatic” feature. - Created skyboxes now have the
AtmosphereSkyBoxcomponent. Only skyboxes with the component and that have a parent withAtmosphereCamerawill have their rotation corrected. - To change the resolution, you can add an
AtmosphereSettingsresource and set theresolutionfield (which should be a multiple of 8). This could be used as part of quality settings in games.
Check out the examples directory to see more!
0.4.1 Patch
- Removed
ATMOSPHERE_INITstage and “init” feature. - Added new “detection” feature that checks for new
AtmosphereCameracomponents each frame, instead of just at startup. (Removal detection will be added in a future release) - Removed unnecessary “radsort” dependency.
- Made removing
AtmosphereandAtmosphereSettingsresources set back to default. settingsexample now shows removingAtmosphereSettings.- Added files to
package.excludeofCargo.toml, in order to reduce package size.